This section allows you to manage the clustering service. The high availability management for load balancing services is facilitated by the clustering service using a collaborative approach with two nodes working in active-passive mode.
A cluster is formed by two nodes working together to ensure continuous availability of load balancing services and to prevent any client-facing downtime. Typically, the cluster operates in active-passive mode with one node acting as the master , handling traffic to the backends and client connections, while the backup node continuously updates its configuration and stands ready to take over if the master node becomes unresponsive.
Key considerations when creating a cluster:
Both nodes must run the same SKUDONET version (i.e., same appliance model).
Both nodes should have different hostnames.
Both nodes should have the same NICs names (Network interfaces).
The master node alone should handle configuration updates; no changes should be made on the backup node.
Configuration of intermediate switching and routing devices may be necessary to avoid conflicts with cluster switching.
Implementing a floating IP is recommended to ensure continuous service availability during cluster switches.
When load balancing service switches between nodes, the backup node takes over all active connections and service statuses to avoid any interruptions for clients.
Configure Cluster Service
The main configuration page for the Cluster service provides the following components:
Synchronization. This service automatically synchronizes configuration changes made on the master node to the backup node in real-time. It utilizes inotify and rsync daemons through SSH for synchronization.
Heartbeat. This service checks the health status of all cluster nodes, swiftly detecting any malfunctioning nodes. It relies on the VRRP protocol over multicast for lightweight and real-time communication, utilizing keepalive in SKUDONET 6.
Connection Tracking. This service replicates connections and their states in real-time, allowing the backup node to resume all connections during a failover, ensuring seamless client and backend connections without any disruptions, thanks to the conntrack service.
Command Replication. This service passively sends and activates configurations applied on the master node to the backup node. During a failover, the backup node assumes control, launching all networks and farms, and quickly resuming connections. This service is managed by zclustermanager through SSH.
The node where the Cluster is configured becomes the master node. Warning: It’s essential to note that any pre-existing configuration on the backup node will be erased, resulting in the loss of Farms (including their certificates), Virtual Interfaces, IPDS rules, etc.
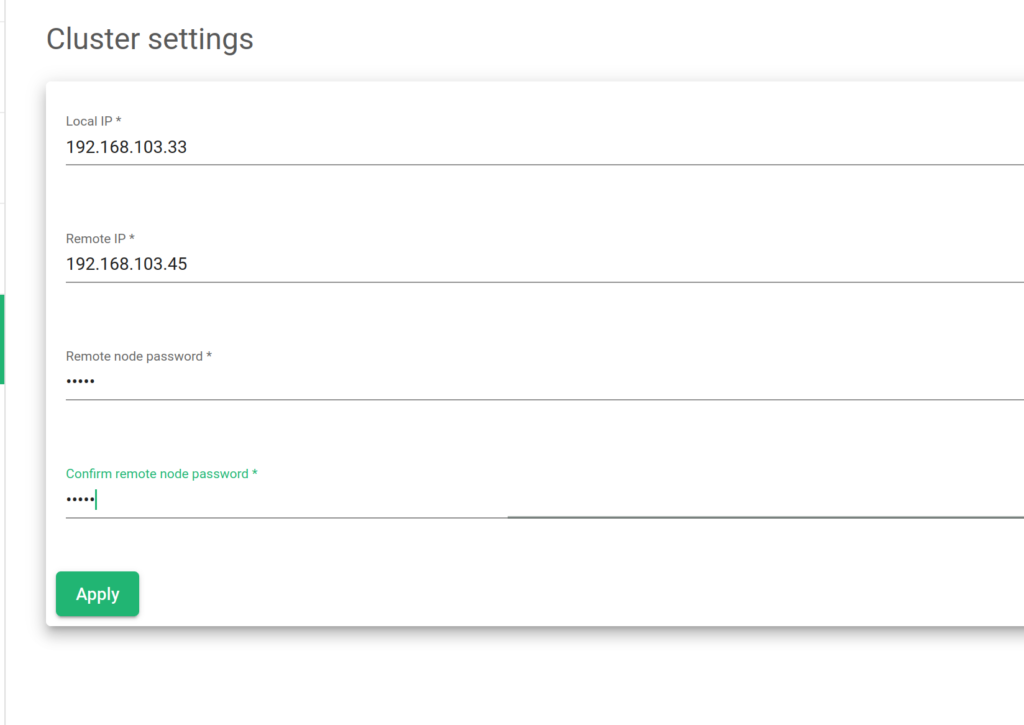
To create a new cluster configuration, the following parameters are required:
Local IP. Local IP: Select from the available network interfaces to be used as the cluster management interface (no virtual interfaces allowed).
Remote IP. Remote IP: Provide the remote IP address of the node designated as the backup node.
Remote node Password. Remote node Password: Enter the password of the root user on the remote (backup) node.
Confirm remote node Password. Confirm remote node Password: Repeat and confirm the password for accuracy.
After setting the necessary parameters, click on the “Apply button.
Showing Cluster Service Details
If the cluster service service is already configured and active, the following information about services, backends, and actions is displayed:
Interface. Indicates the network interface where the cluster services are configured.
Failback. Specifies whether the load balancing services should return to the master node once it becomes available again or maintain the current node as the new master. This option is useful when the backup node has fewer resources allocated than the master, and the latter should be the preferred master for services.
Check Interval. Specifies the time between each health check from the backend node to the master’s health.
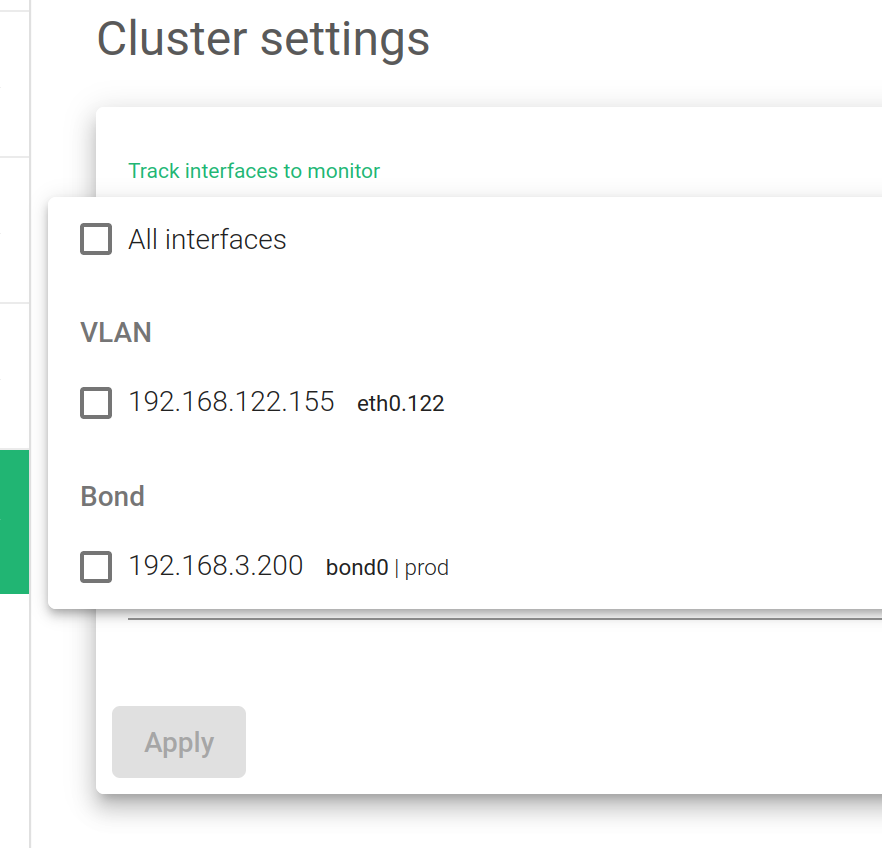
Tracked interfaces. Shows the active network interfaces being monitored in real-time.
Actions. Provides available actions to apply.
- Show Nodes. Show the table nodes and their status.
- Edit. Change some configuration settings for the nodes in a cluster.
- Destroy. Remove the configuration setting and remove a node.
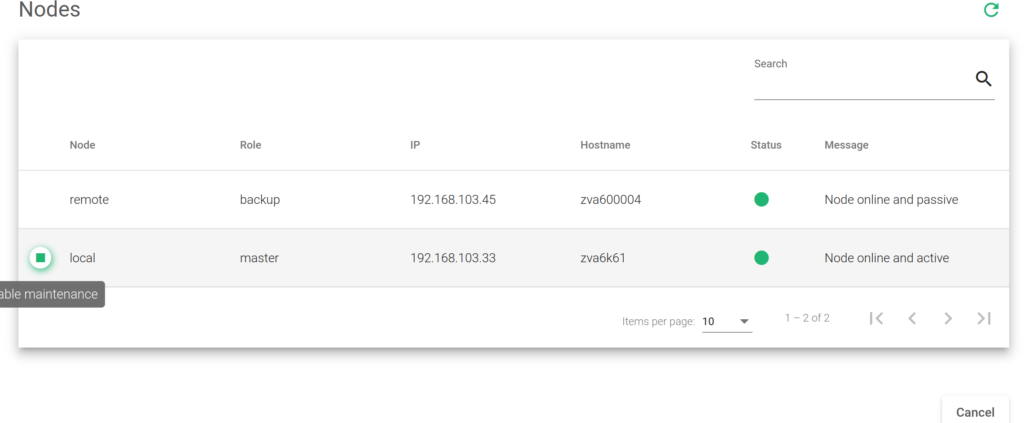
The Show Nodes action presents a table with the following details:
Node. Indicates whether each node is local or remote, depending on the type of node connected through the web GUI. Local refers to the currently connected node, while remote is the other node.
Role. Specifies the role of each node in the cluster, such as master, backup (slave), or maintenance (temporarily disabled).
IP. Displays the IP address of each node in the cluster.
Hostname. Shows the hostname of each node in the cluster.
Status. Represents the status of each node:
- Red. If there is any failure.
- Grey. If the node is unreachable.
- Orange. If it’s in maintenance mode.
- Green. If everything is OK.
Message. Provides a debug message from the remote node, serving as additional information for each node in the cluster.
Actions. Offers available actions for each node, such as enabling maintenance mode to temporarily disable a cluster node for maintenance purposes and avoid a failover.
Cluster configuration
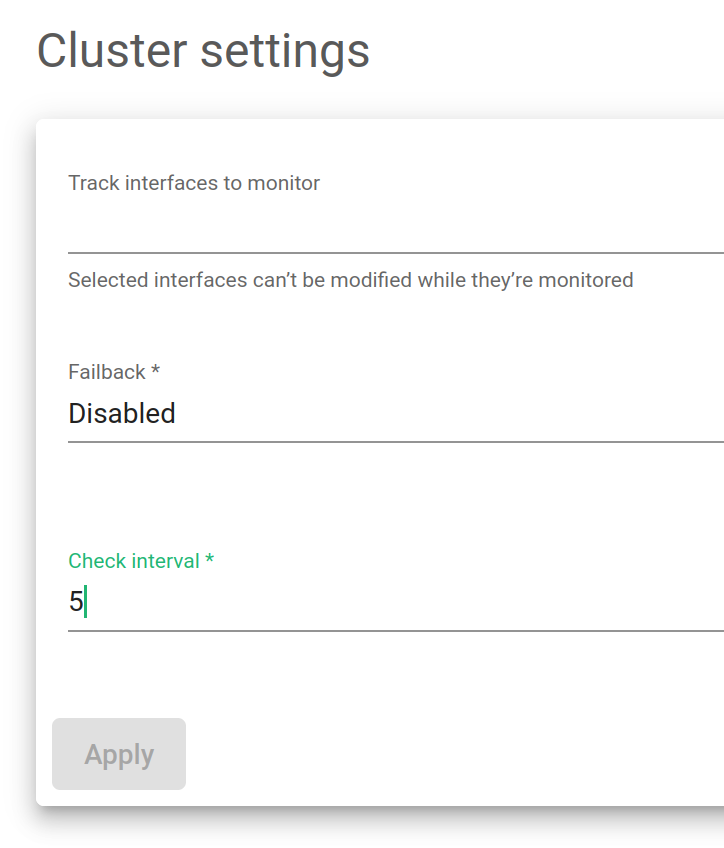
The global setting options available are described below:
Failback. Allows selecting which load balancer is preferred as the master.
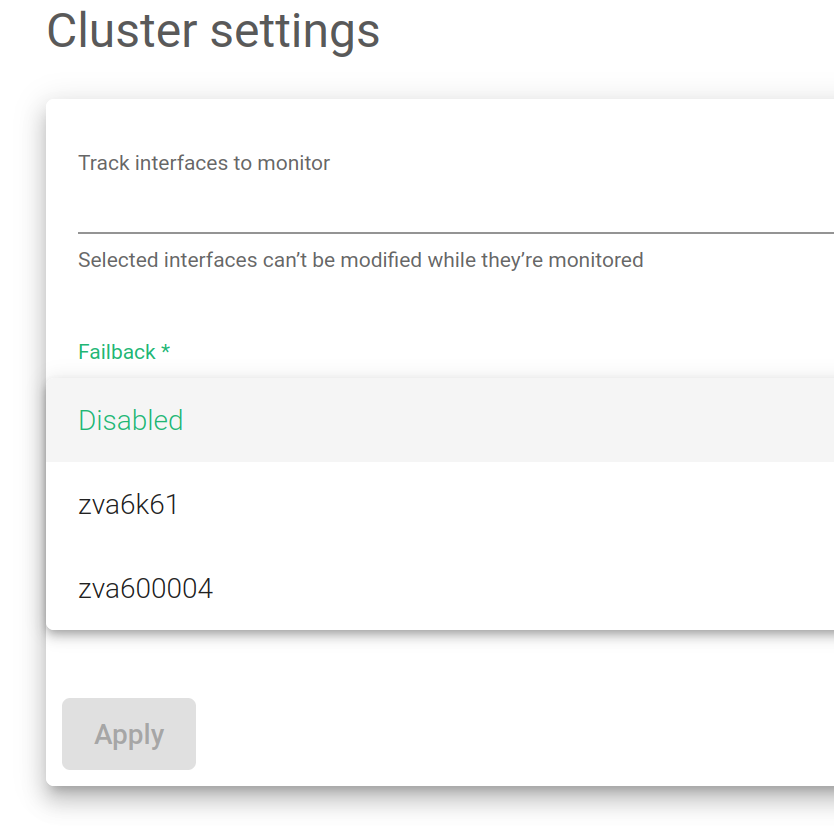
Track Interfaces to monitor. Gathers information from specific interfaces in your lists, including LAN or VLAN.
Check Interval. Sets the time between each health check from the backend node to the master’s health.
Clicking on the Apply button applies the changes made to the cluster configuration.

