Contents
Overview
FTP or File Transfer Protocol is an application layer protocol widely used for file transferring in a client-server architecture design that relies on TCP/IP network layers. FTP is a complex and plain (no security-aware) protocol in which ports used are negotiated at the application layer between the client and the server, so it’s a little bit difficult to load balance or create firewall rules. In addition, the FTP server and client could behave in active or passive modes, which could be described below.
Some features that provide FTP are: 2 TCP ports (20, 21 by default) used one for control commands and another for data, authentication mechanism support, no ciphering support, ascii and binary transferring, broad commands available (directory listing, directory browsing, upload files, download files, etc.) and inherent TCP resilience.
TFTP or Trivial FTP is a variation with a faster file transferring and simpler architecture design that uses just one UDP port (69 by default), no authentication mechanism support or ciphering, three transferring modes available (netascii, octet and mail) and only basic commands like upload and download files.
Both FTP and TFTP services can be load balanced easily with SKUDONET Load Balancer. Keep reading to know how to achieve it.
FTP load balancing environment
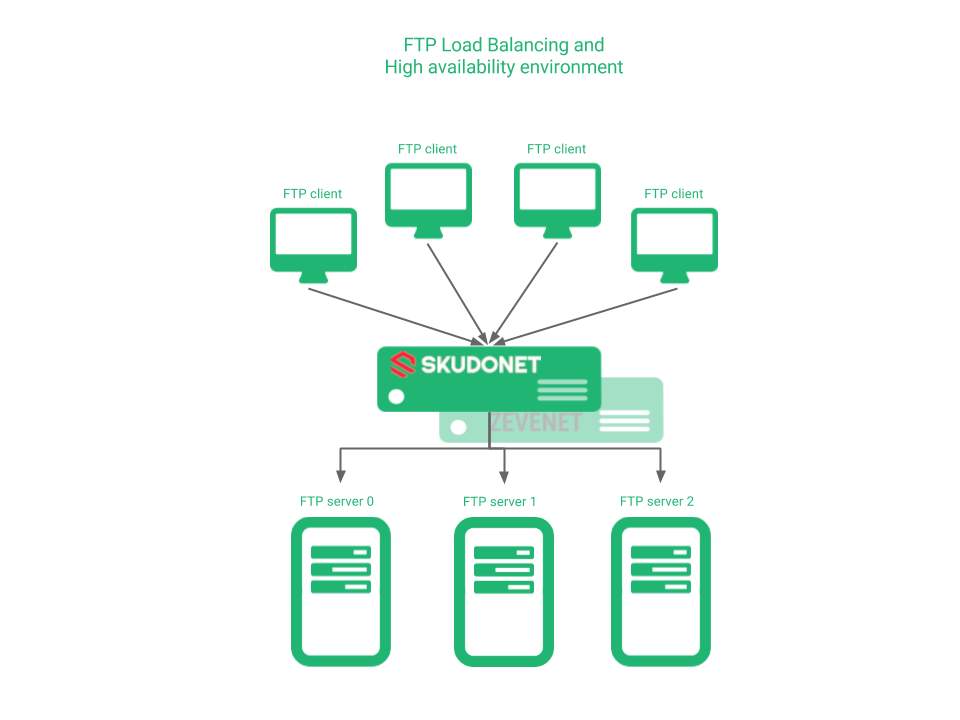
The scenario that we want to achieve in this article is shown in the diagram below.
Either there is a high concurrency of users and it’s required to scale the service or it’s a critical service that needs to be highly available, an FTP service load balancer will be needed.
Active FTP Mode Configuration
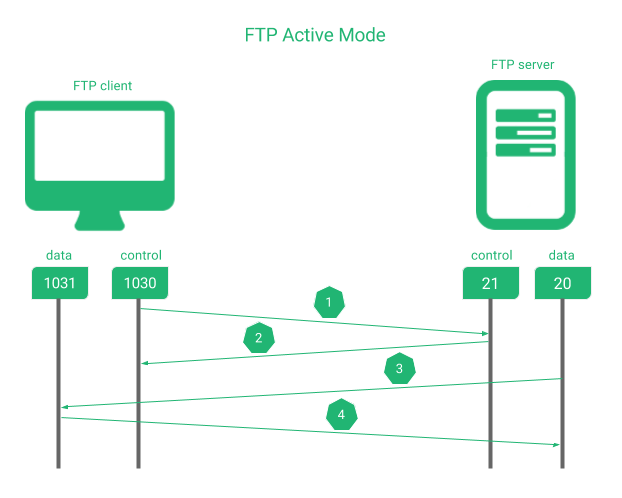
An active FTP setup will require to use the ports 20 and 21 in the servers or backends side. The picture below shows how the connection flows when data is required to be transferred between a client and a FTP server.
In the sequence shown above:
1. The client requests to the server via port 21 a command.
2. The server acknowledges the client.
3. The server initiates the data connection using the data port 20.
4. The client acknowledges the server when it’s finished.
At this point, we’ve to set up a load balancer between both client and server and then take care of the traffic flows, connections initializers and port agreements between client and server.
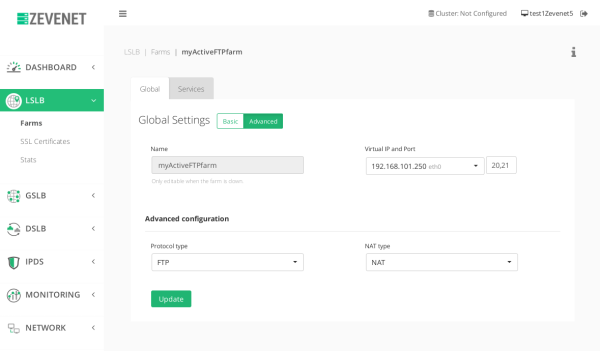
With SKUDONET Load Balancer, we’ve to achieve this kind of configuration by creating an LSLB farm profile L4xNAT with ports 20,21 and FTP protocol, as it’s shown in the picture below, and finally set the backends (not required to set the ports).
The clients have to connect to the VIP address of the new FTP farm.
Note: This configuration is saved to be used for both active and passive client/server modes.
Passive FTP Mode Configuration
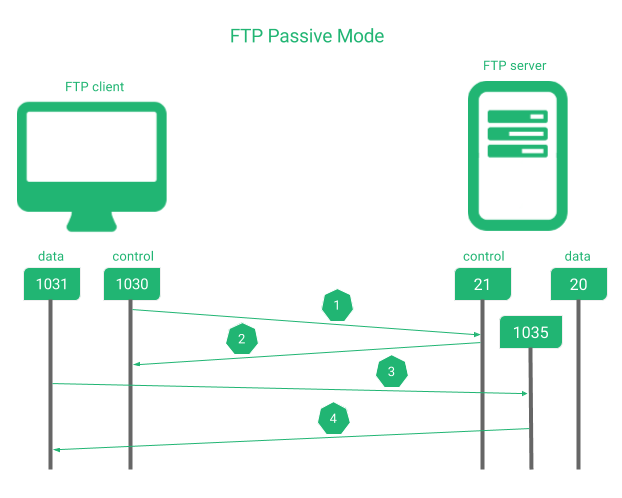
A passive FTP setup only uses port 21 in the servers or backends side. The picture below shows how the connection flows when data is required to be transferred between a client and a FTP server.
In the sequence shown above:
1. The client requests to the server via port 21 a command.
2. The server acknowledges the client.
3. The client initiates the data connection using a high data port to an application layer agreed port on the server side.
4. The server acknowledges the client when it’s finished.
At this point, we’ve to set up a load balancer between both client and server and then take care of the traffic flows, connections initializers and port agreements between client and server.
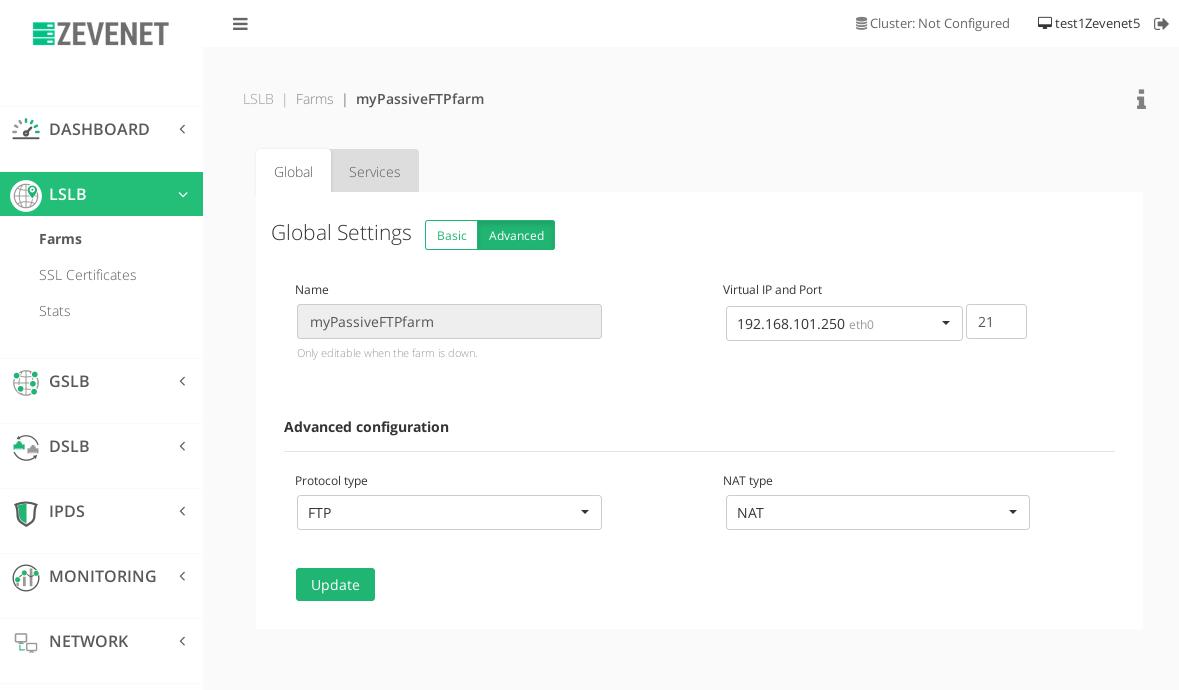
With SKUDONET Load Balancer, we’ve to achieve this kind of configuration by creating an LSLB farm profile L4xNAT with the port 21 and FTP protocol, as shown in the picture below, and finally setting the backends (not required to set the ports).
The clients have to connect to the VIP address of the new FTP farm.
TFTP configuration
Trivial FTP protocols are used mainly during PXE (Preboot eXecution Environment) environments that are composed by a combination of DHCP and TFTP services, where tens, hundreds or even thousands of computers can be deployed through the network.
The main protocol behaviour would be:
1. The client requests to the server via port 69 a Read Request (RRQ) or Write Request (WRQ) command including the file and transfer mode.
2. The server acknowledges the client and notifies the new data port to be used.
3. The client initiates the data connection to an application layer agreed port on the server side.
4. The server acknowledges to the client when the latest 512 bytes are remaining.
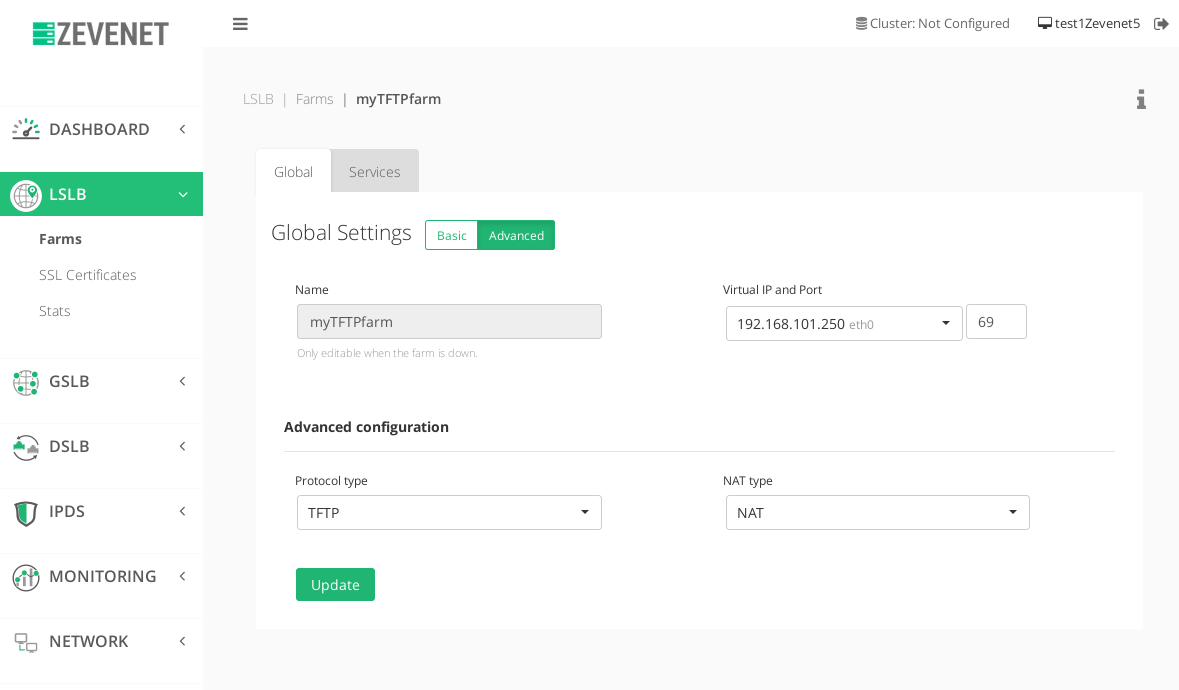
In an environment where the TFTP service needs to scale, the configuration with SKUDONET 5 is very easy. It’s required to create an LSLB farm profile L4xNAT with the port 69 and TFTP protocol, as shown in the picture below, and finally set the backends (not required to set the ports).
The clients have to connect to the VIP address of the new TFTP farm.
Secure FTP
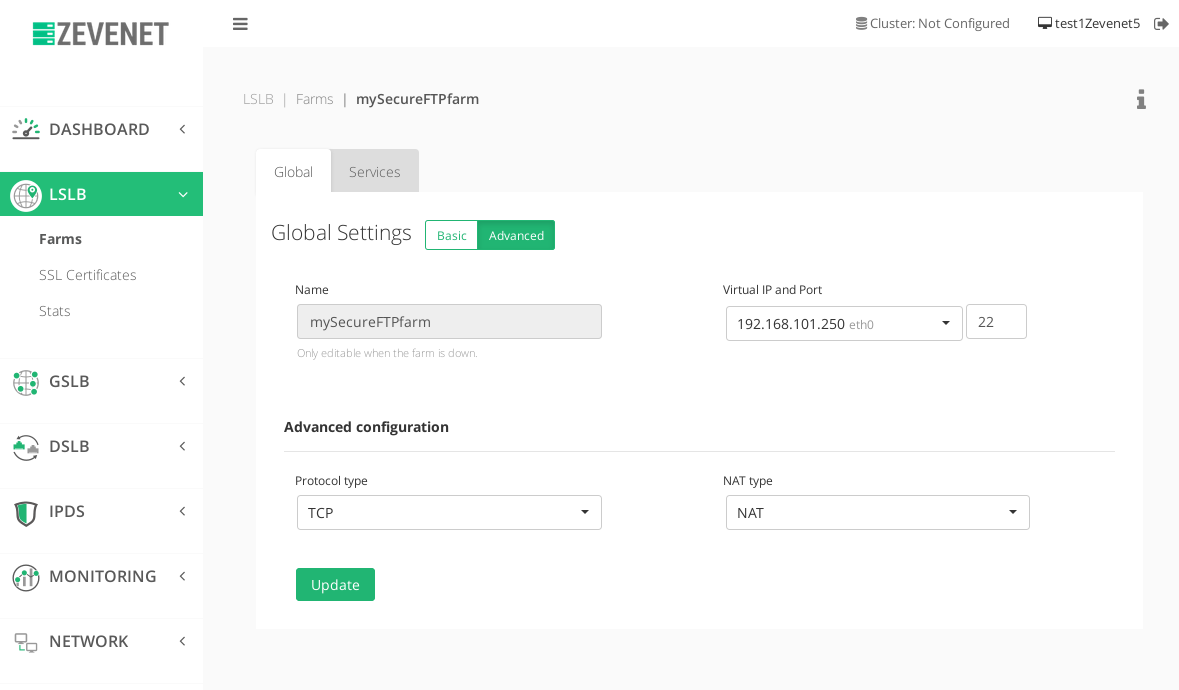
To solve the enhanced security of FTP protocol, the SSH File Transfer Protocol better known as SFTP was designed to provide a security layer. In that scenario, the FTP servers should be configured as SFTP and the load balancing of those would be as easy as creating an LSLB with L4xNAT profile farm over the default port 22 and protocol TCP as shown in the screenshot below. Finally, just add your SFTP service backends.
The clients have to connect to the VIP address of the new TCP farm, that serves a SFTP service.
Advanced health checks
FTP health check
SKUDONET appliances already include the check_ftp health check for FTP services, so we can test the health check with an up backend:
root@skudonet:/usr/local/zenloadbalancer/app/libexec# ./check_ftp -H ftp.debian.org
FTP OK - 0.262 second response time on ftp.debian.org port 21 [220 ftp.debian.org FTP server]|time=0.262090s;;;0.000000;10.000000
On the other hand, with a down backend, we’ll get the following output:
root@skudonet:/usr/local/zenloadbalancer/app/libexec# ./check_ftp -H ftp.debian.org
CRITICAL - Socket timeout after 10 seconds
So the Farm Guardian command to configure in the FTP farm would be:
check_ftp -H HOST
In the Services tab ensure the configuration of Farm Guardian as shown below. A timeout of 60 seconds would be enough to ensure the correct behaviour of a backend.
TFTP health check
If the check_tftp advanced check doesn’t already exist in the SKUDONET appliance, we can create an easy health check script as described below for our TFTP services.
Firstly, create a dummy file in your TFTP backends directory, for example, tftp_skudonet_check.txt, and add some content, for example, “OK”.
Then, in your SKUDONET appliance install the tftp client with by executing the following command:
apt-get install tftp
And then, create a new script file in the SKUDONET health checks default directory, for example /usr/local/zenloadbalancer/app/libexec/check_mytftp.sh with the following script code:
#!/bin/bash
###
### Check TFTP services
### Copyright 2017-now SKUDONET SL
###
### $1 : Host to be checked
CRITICAL=1
OK=0
RESULT=$(echo get tftp_skudonet_check.txt | tftp $1 2>&1 | head -n 1)

echo "TFTP health check status for $1 is $RESULT"

if [ "`echo $RESULT | grep Received`" != "" ]; then
        exit $OK
else
        exit $CRITICAL
fi
Then, assign execution permissions with the command:
root@skudonet:/# chmod 755 /usr/local/zenloadbalancer/app/libexec/check_mytftp.sh
If we try to execute the script we’ll get a successful message when the backend is up and well configured:
root@skudonet:/usr/local/zenloadbalancer/app/libexec# ./tftp_check.sh 192.168.101.250
TFTP health check status for 192.168.101.250 is tftp> Received 4 bytes in 0.0 seconds
or an error when the backend is down:
root@skudonet:/usr/local/zenloadbalancer/app/libexec# ./tftp_check.sh 192.168.101.250
TFTP health check status for 192.168.101.254 is tftp> Transfer timed out.
Finally, configure the health check in the TFTP farm, including in the command the HOST token.
check_mytftp.sh HOST
In the Services tab ensure the configuration of Farm Guardian as shown below. A timeout of 60 seconds would be enough to ensure the correct behaviour of a backend.
SFTP health check
As there is already available the health check check_ssh, we can use it directly. So the Farm Guardian command to configure in the SFTP farm would be as follows:
check_ssh HOST
Then, the configuration would be shown as it’s shown in the following screenshot.
Enjoy your high available and scalable file transferring!

