Overview
eClinicalWorks is a leader in ambulatory clinical solutions, whose intent is to get rid of paper and digitize the communication and workflow between a physician’s office and the rest of healthcare process: from the doctor, to the pharmacy, to the lab and to the doctors supply chain. It provides a web application to extend the use of electronic health records beyond practice walls and creates community-wide records. It’s widely used in United States and they’re established in more than 24 countries.
This guide describes the optimal configuration of eClinicalWorks application with ZEVENET Application Delivery Controller in order to provide scalability, high availability, advanced health checks for monitoring and enhanced security of this application with sensible data.
Requirements
1 HTTP farm, named eclinical as an example.
Cookie insertion enabled with the Cookie Name set to eClinical_Cookie.
At least 2 real servers or backends with eClincalWorks instances.
FarmGuardian configuration for advanced health checks.
A SSL certificate in PEM format to configure HTTPS listener (from a trusted CA or self signed), if SSL Offload will be enabled.
Basic Load Balancing Configuration
Create a HTTP Farm
Go to LSLB >> Farms and press the button CREATE FARM.
During the farm creation, configure the farm as shown in the picture below where the Virtual IP will be the IP Address in the load balancer and Virtual Port the port where the application will be delivered. Press APPLY.
Edit HTTP Farm Global Parameters
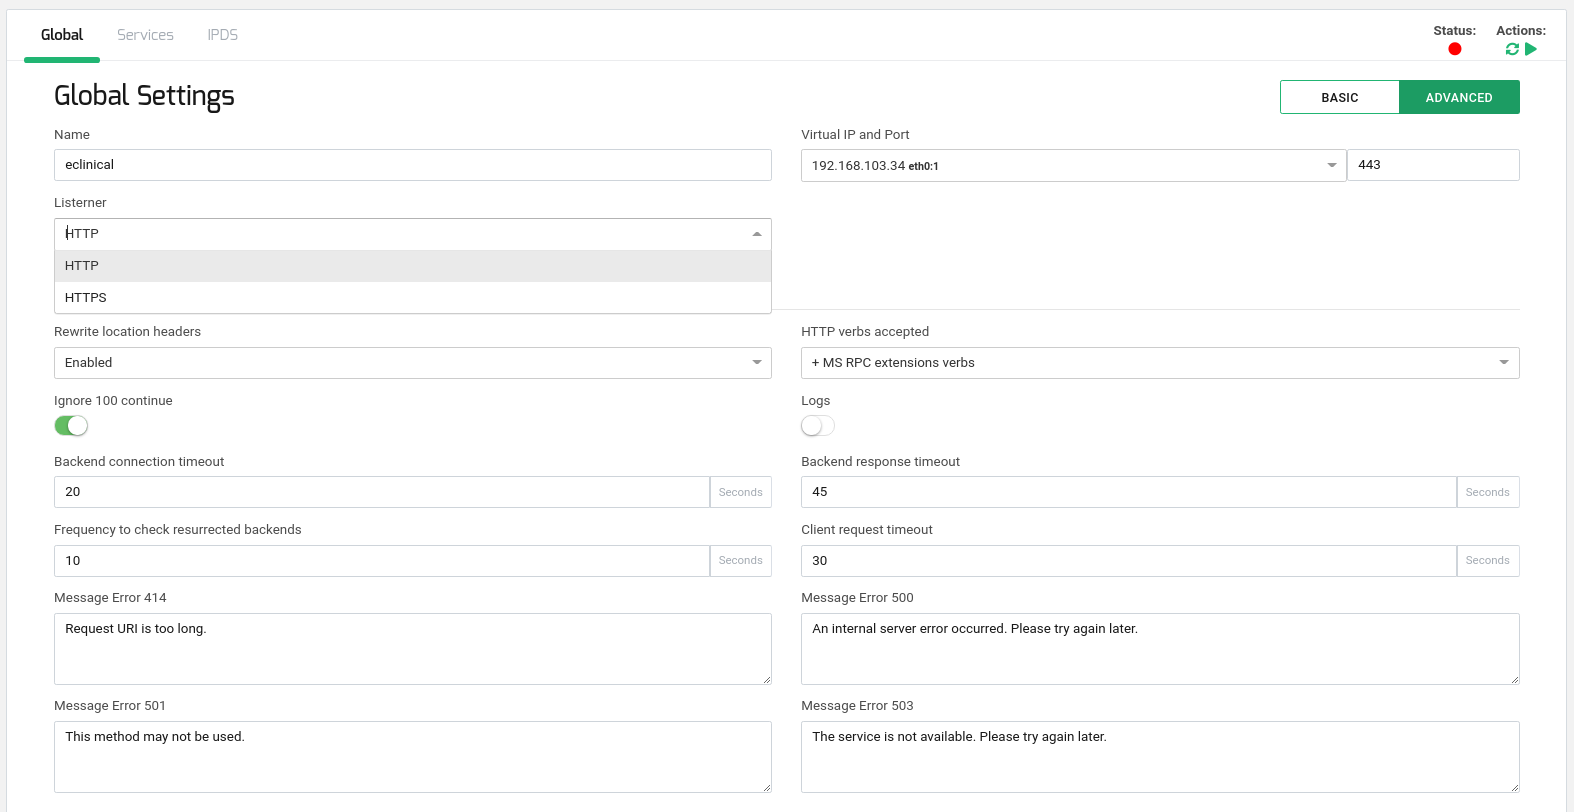
Edit the HTTP Farm Global Parameters as shown below, clicking in the ADVANCE Button.

Add a new HTTP Service
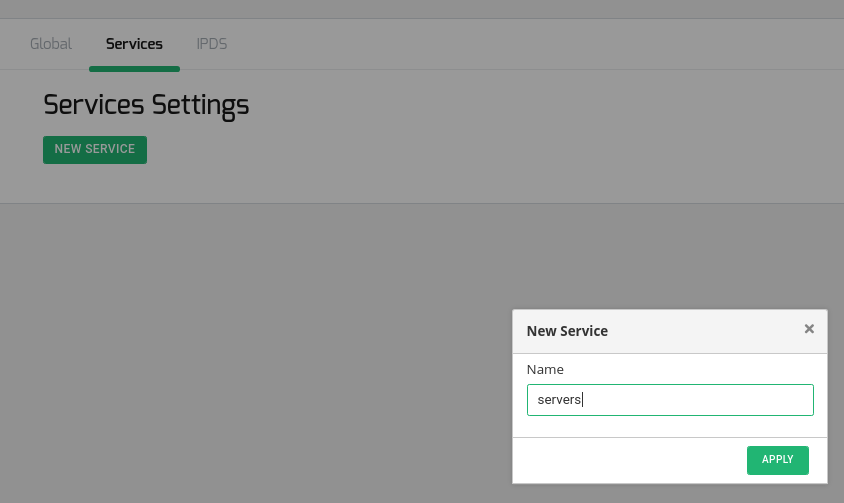
Create a new HTTP service, named servers as an example, within the eclinical farm created before.
In order to do that, please go to the Tab Services and press in the button NEW SERVICE introduce the selected name for the service (servers in our example) and press APPLY.
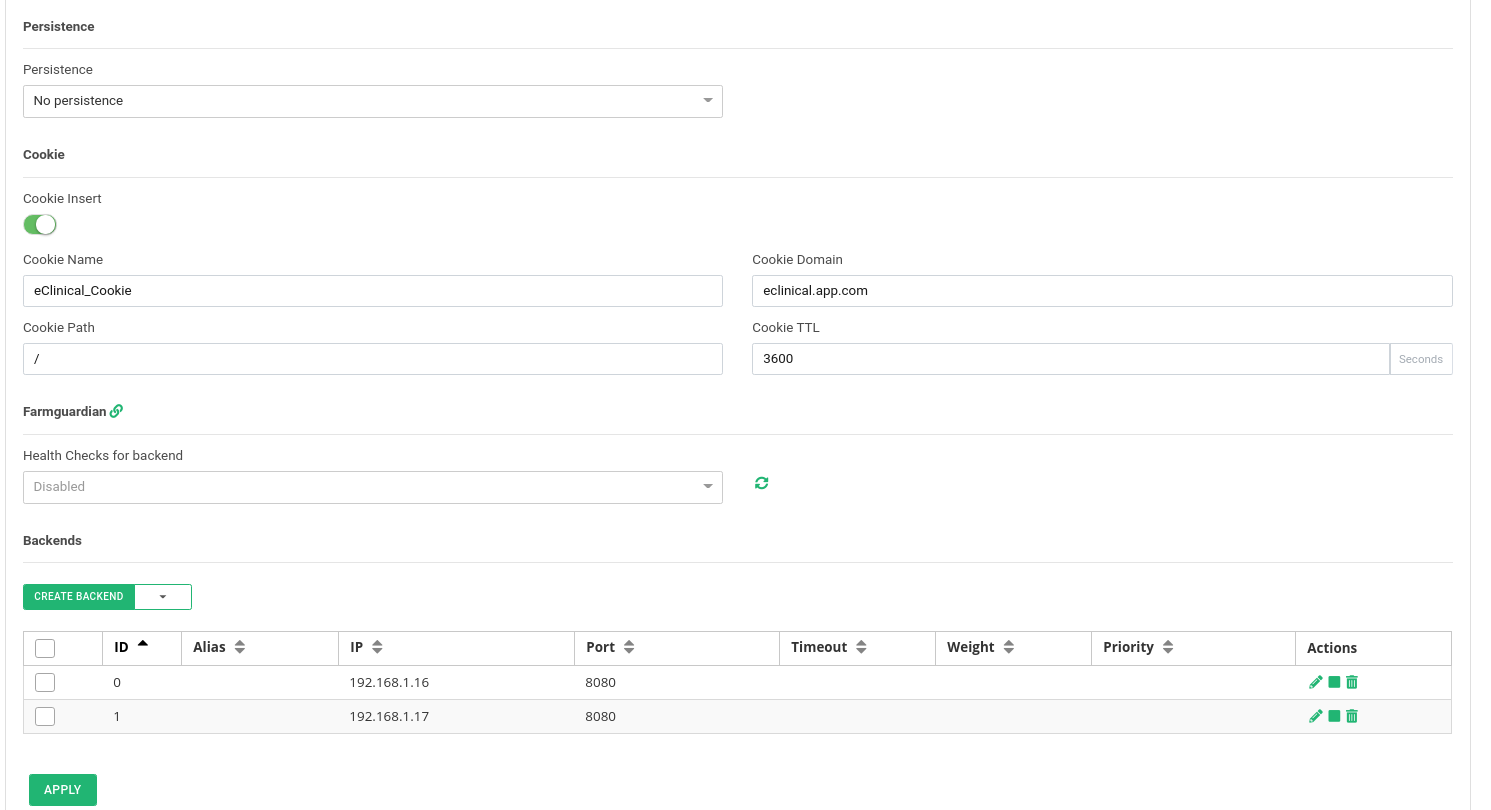
Now go to the created service with name servers, and enable the Cookie insertion option with the Cookie Name set to eClinical_Cookie where Domain field is your application domain (eclinical.app.com in our example if our users will enter through http://eclinical.app.com) and Path field set to / in order to enable the cookie for the whole application. The TTL could be set to 3600 (1 hour) and no persistence enabled.
Finally, add the list of the backends IP addresses and port as it’s shown in the picture below.
Restart the HTTP service in order to apply the changes and it’s done!
Advanced Health Checks Configuration
The basic HTTP farm configuration provides an inherent TCP health check during the connection between ZEVENET Application Delivery Controller and the real servers. In order to ensure the correct application behavior it’s required to configure an advanced health check with FarmGuardian, you can use check_http checks or another by your own, just to ensure that not only the TCP backend port 8080 is enabled but an HTTP response is replied.
SSL Offload configuration
As eClinicalWorks manages sensible data, it’s recommendable to set up a SSL Offload configuration in the load balancer. This way, the client connects through a HTTPS secure channel to the virtual service in the load balancer, and then the load balancer connects in plain HTTP to the backends.
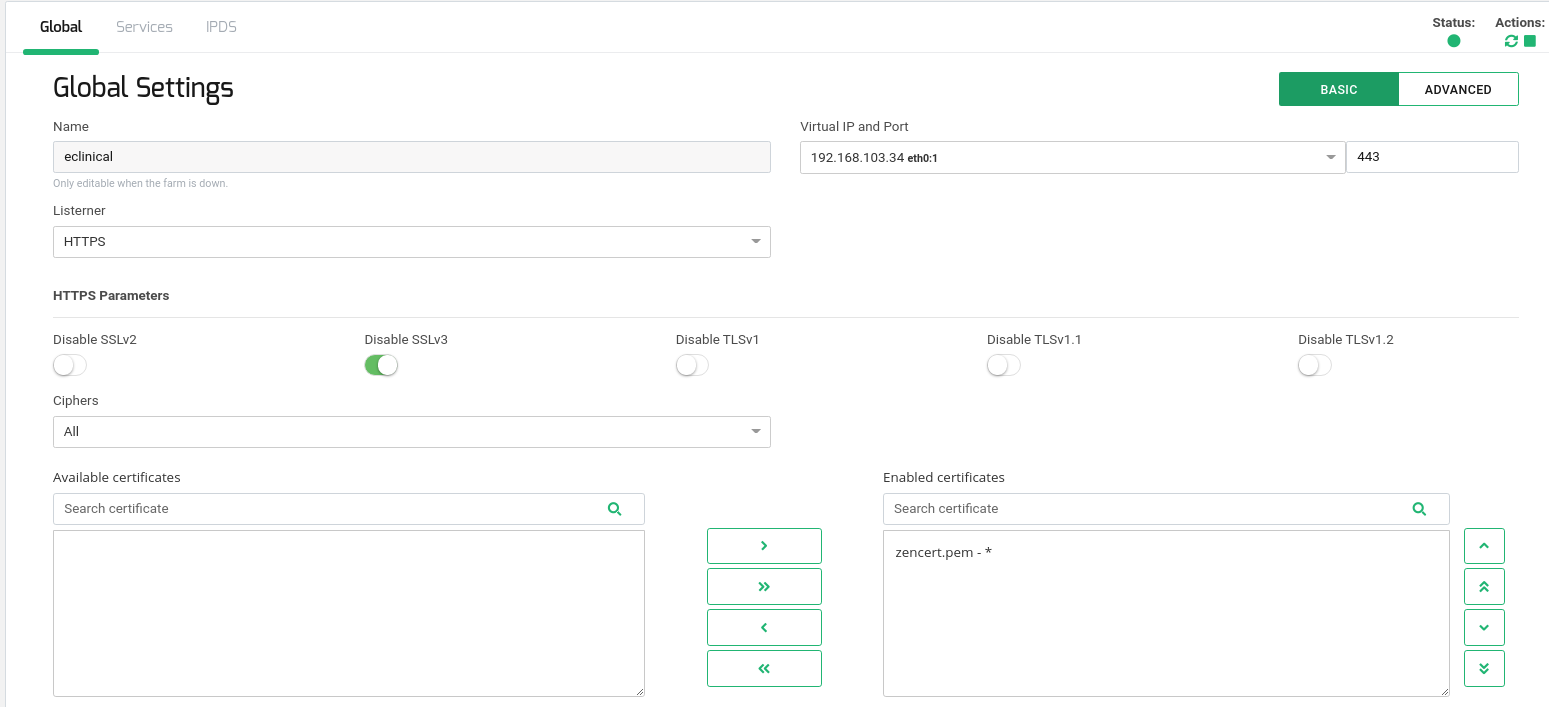
It’s quite easy to setup a HTTPS service for eClinicalWorks just change the Farm Listener to HTTPS , Virtual Port to 443 (standard for HTTPS protocol), ensure to have the HIGH security ciphers configured and finally, install your self signed or trusted certificate acquired (the default zen certificate is available in order to test your HTTPS setup, but it’s mandatory to change it as soon as possible). In order to setup your certificate refer to this article for more information.
High Availability Configuration
The high availability configuration allows to setup 2 load balancer nodes to create high availability through redundancy. Once your first node is configured, just create a Virtual IP Address in the load balancer, change it in your new eClinicalWorks farm and create the cluster as described in this article. The full configuration will be replicated to the second node automatically, so it’s not needed to reconfigure your setup.


