Contents
Intro
A proxy server functions as an intermediary between clients or customers seeking resources from various servers. In essence, the proxy server acts on behalf of the client when a service is requested, potentially hiding the true origin of the request from the server.
Here’s how it works: Rather than the client directly connecting to a specific server that can provide the requested resource, such as files or web content, the client sends the request to the proxy server. The proxy server then evaluates the request and executes the necessary network transactions. This approach simplifies and manages the complexity of the request, while also offering benefits like security, content acceleration, and privacy. Proxies play a role in encapsulating and structuring existing distributed systems. Commonly used web navigation proxies include Squid, Privoxy, and SwiperProxy.
However, there are instances when a proxy server might not handle the volume of concurrent users or when the proxy itself becomes a single point of failure that requires attention. This is where an ADC comes into play.
The subsequent article outlines a method for achieving high availability and scalability for a navigation proxy service. In the event of a Proxy server failure, the load balancer, facilitated by SKUDONET Application Delivery Controller, identifies the issue and removes the faulty proxy from the available pool. Simultaneously, the client is rerouted to another operational navigation proxy, ensuring uninterrupted traffic connections.
Proxy network architecture
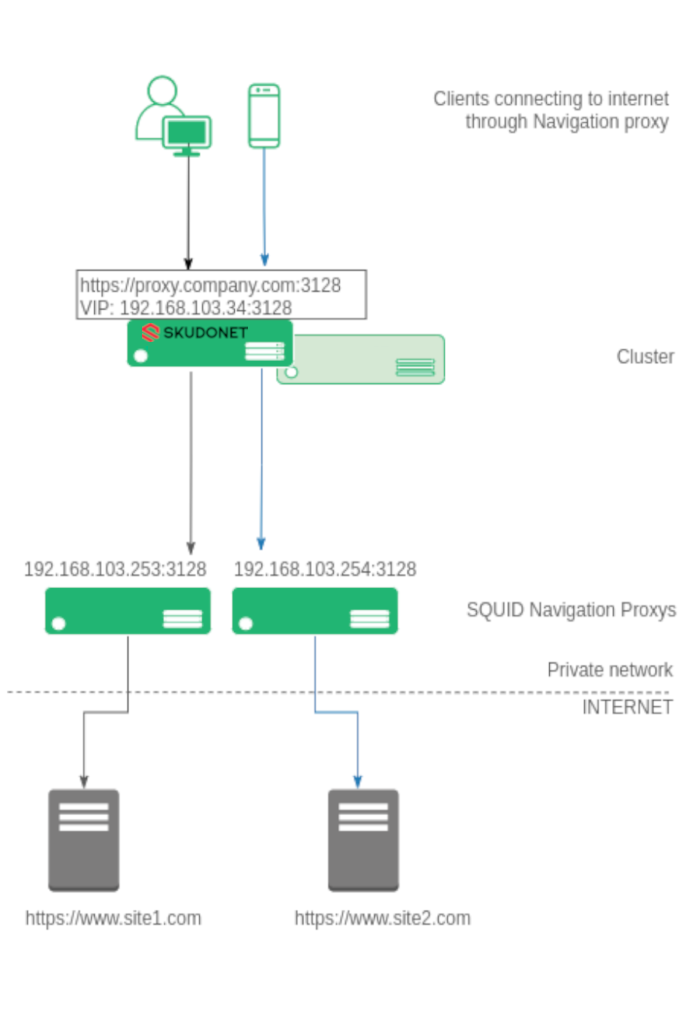
To enhance comprehension, we aim to illustrate the architecture with the following diagram.
Diverse clients, including laptops, computers, mobile devices, and tablets, are configured to connect to the corporate proxy at https://proxy.company.com:3128. All connections from clients to the web navigation proxy, whether in HTTP or SSL, operate via TCP. This forms the basis for our load balancing setup.
The Virtual IP for proxy.company.com is configured within the load balancer. The SKUDONET Application Delivery Controller establishes a farm over this Virtual IP, such as 192.168.103.34, with a Virtual Port of 3128 in NAT mode for the TCP protocol.
Within the farm, all backend systems constituting the navigation proxy pool are configured. For instance, 192.168.103.253 and 192.168.103.254 via TCP port 3128 in our example. When a client attempts to connect to the configured proxy, the ADC intercepts the connection and directs it to one of the available navigation proxies within the pool. This approach evenly distributes users across the accessible backend proxy servers.
The subsequent section outlines the configuration process to establish a robust setup for load balancing Navigation proxies within the SKUDONET load balancer.
To begin, generate a health check intended for usage in the forthcoming load balancing farm configuration. This health check is designed to validate the activation status of the TCP port on the backend proxies.
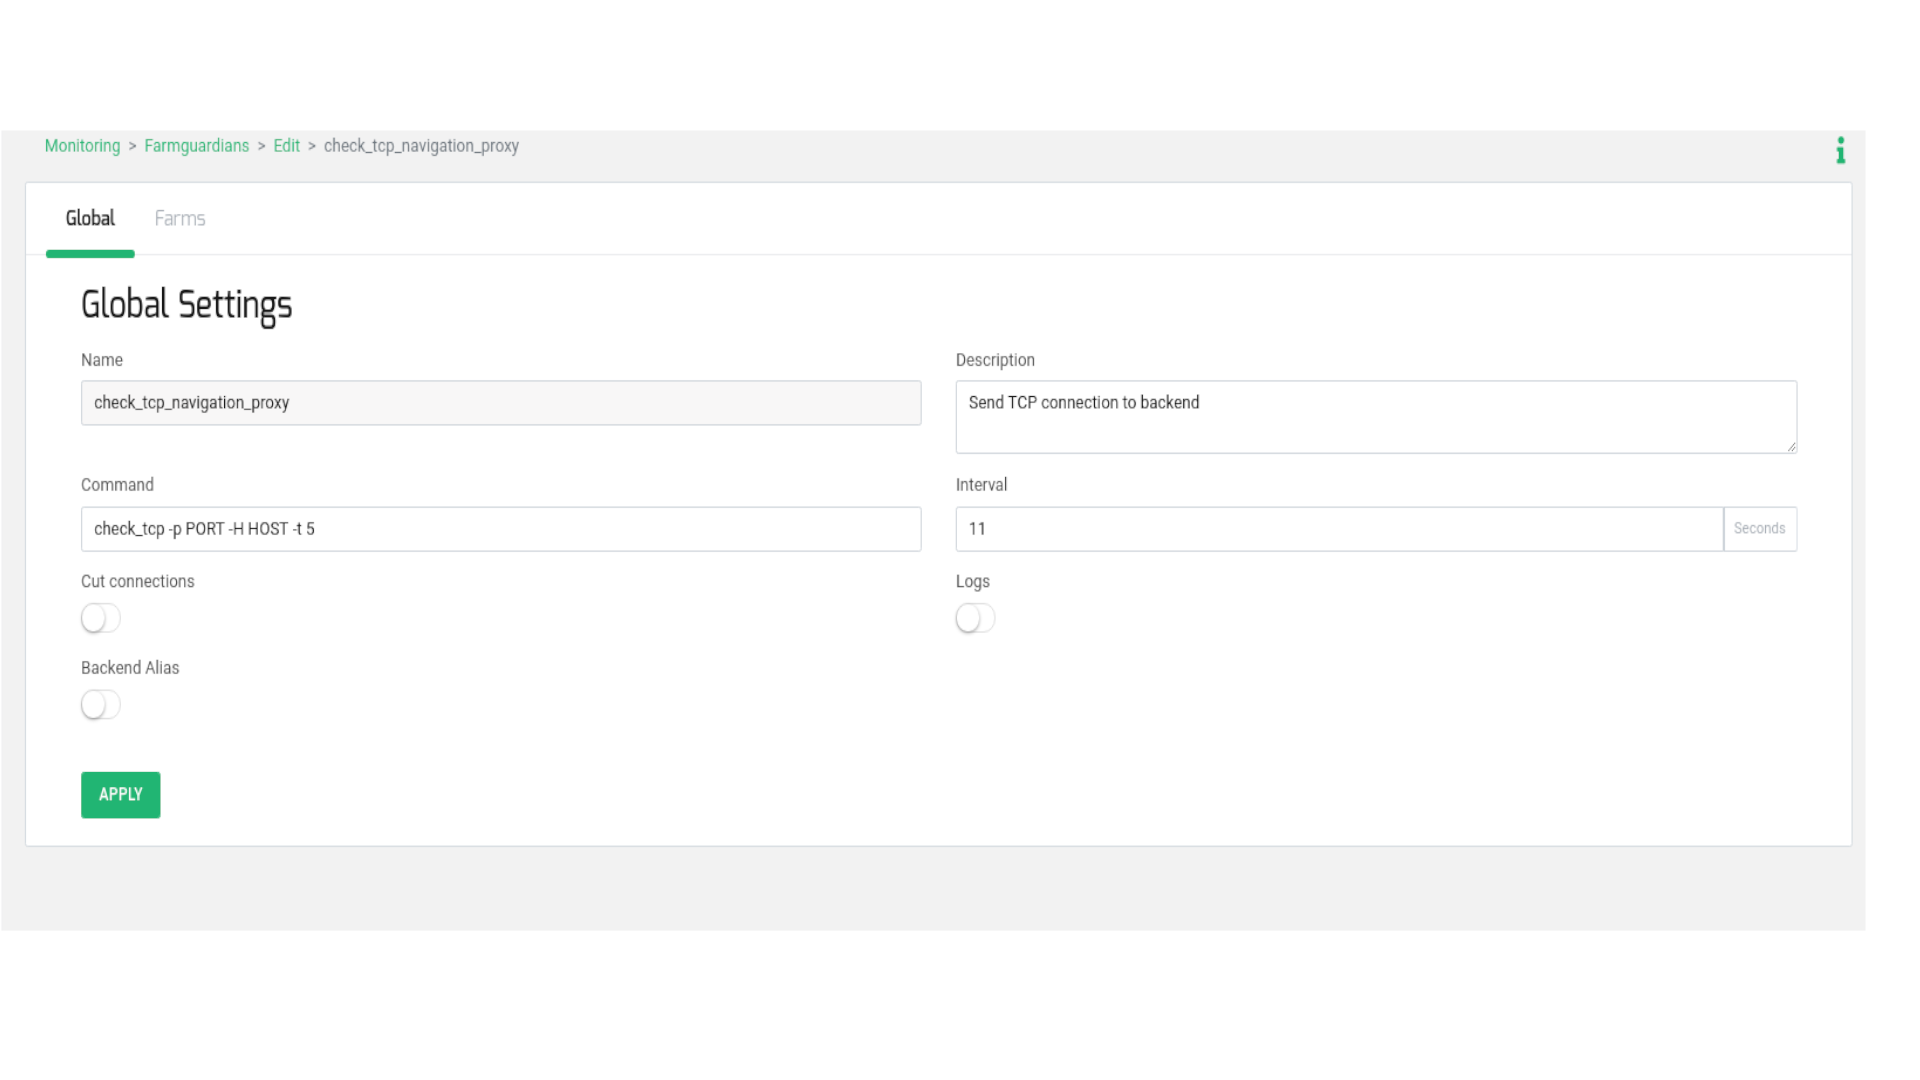
Navigate to the MONITORING > Farm guardian section. Generate a new farmguardian labeled check_tcp_navigation_proxy, duplicating the settings from check_tcp. Apply minor adjustments to the timeouts, as demonstrated below:
Incorporate the -t 5 flag within the Command field. This signifies a timeout of 5 seconds per backend to respond to the TCP connection initiated by the load balancer. Configure the Interval field with a value of 11, which encompasses 5 seconds per backend and an additional second to prevent recursion. For optimal Interval value setup, we suggest utilizing the following formula:
(number of backends * timeout seconds per backend (-t) ) + 1
Next, generate an LSLB > L4xNAT farm, naming it, for instance, navigation_proxy, and specifying the Virtual IP and Virtual Port according to the earlier diagram. After creating it, access the Advanced mode for editing and confirm that Protocol Type is set to TCP and NAT Type is set to NAT mode.
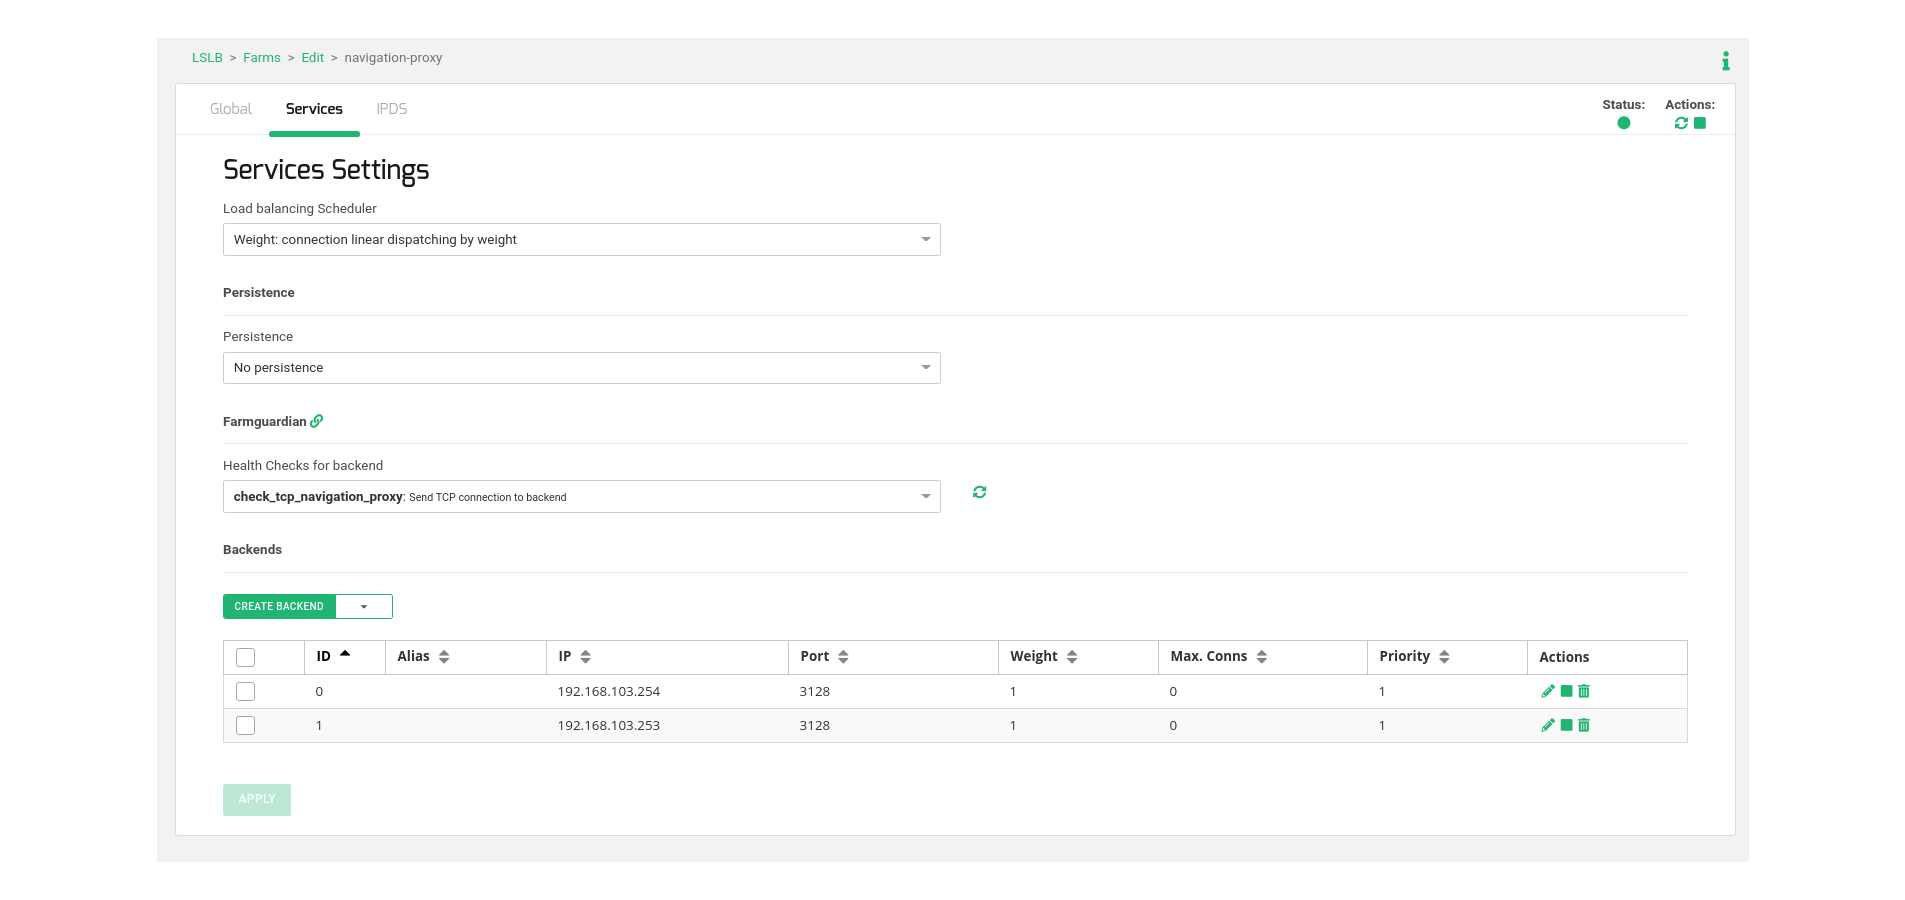
For configuring the virtual service behavior, proceed to the Services tab and specify the load balancing algorithm, commonly Weight (default). Adjust this value to match your environment and desired operation.
Subsequently, navigate to the Backends table within the same section, and include the actual web navigation proxy servers responsible for managing user connections.
Lastly, select the previously created health check named check_tcp_navigation_proxy to ensure the availability of the TCP backend port.
Now, it’s possible to test the load-balanced virtual service prior to configuring the clients.
Client Configuration
The final step involves configuring the proxy settings in the web browser of the clients. These settings should be directed towards the Virtual IP and Virtual Port utilized in the load balancer. Alternatively, you can integrate the Virtual IP into the corporate DNS and employ a designated Name in the clients. For instance, in our scenario, proxy.example.com is aligned with the Virtual IP 192.168.103.34.
Upon completion of this setup, you can relish the benefits of your high availability load-balanced web navigation proxy!


